How to setup ServiceNow for robotic process automation
Robotic process automation (RPA) is a technology through which we can create, manage, deploy robots into a system that emulates human interactions.
RPA is just like sitting on a chair and let the bots work on behalf of you. RPA bots in ServiceNow help in the following ways:
- It reduces manual and repetitive work like data entry, so that people can focus on critical tasks. Like if you want to gather the daily, weekly, monthly weather or currency exchange data, you do not have to manually enter it into an Excel sheet or to your workflow. RPA will take care of it for you in just few clicks.
- RPA facilitates the seamless integration of legacy systems. It possesses the capability to launch any standalone Windows application (executable files with .exe or .msi extensions). Leveraging computer vision technology, RPA can populate data fields or extract data from these applications, enabling efficient data entry and retrieval processes.
A recent Gartner study found that over 60% of tech leaders are currently deploying RPA and AI tools as part of their organization’s hyper automation strategy.
Clearly, there is a stronger focus on accelerating automation at scale – driving the need for new technologies that can automate tasks and processes, and leverage AI to accelerate time to value and ROI.
Leveraging automation with ServiceNow RPA integration
RPA helps rapidly automate any rule-based UI task or sequence of actions in RPA Desktop Studio. Publish to RPA Hub for deployment, management, and orchestration into broader ServiceNow workflows. Call flows easily from bots and bots from flows with no code.
High-level architecture of ServiceNow RPA
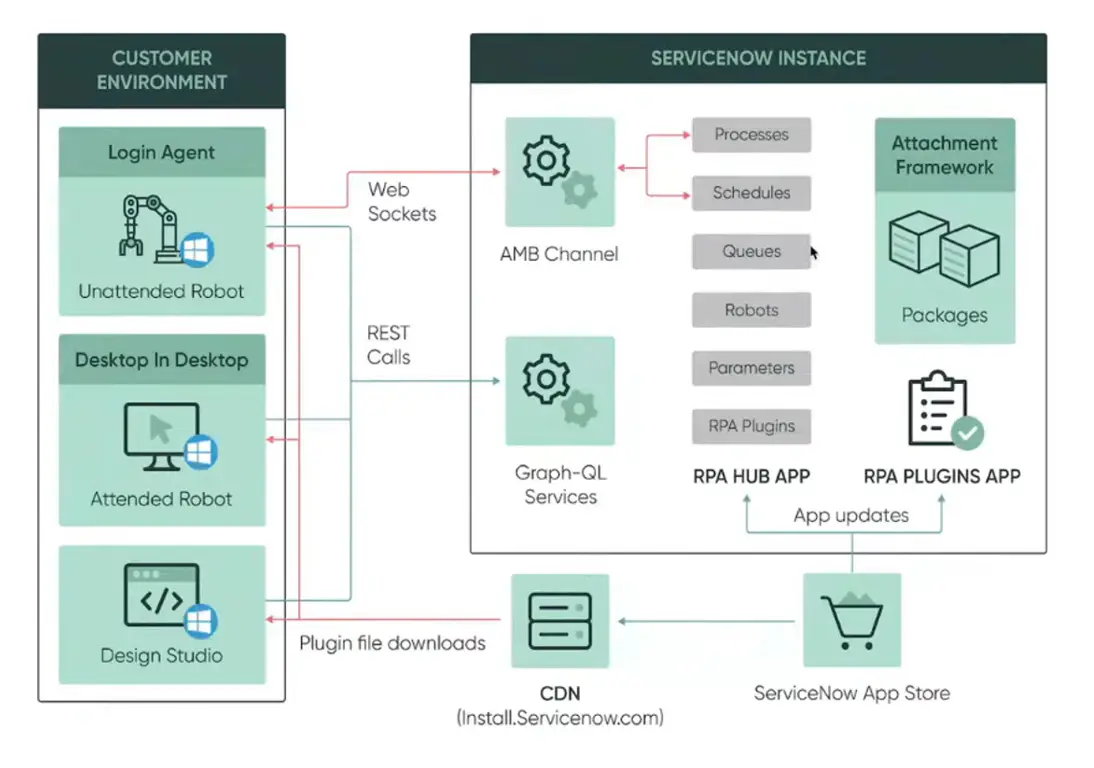
Desktop Design Studio: We design and configure robotic flows for automation through Desktop Design Studio.
Unattended Robot: This will run without the need of human interaction. Like legacy standalone applications, this is controlled through Orchestrator and will be deployed to dedicated virtual machines which are connected to Orchestrator. Login Agent is a way to self-invoke RPA bot when the automation process is triggered.
Attended Robot: Attended bots automate repetitive and mundane tasks. It requires human interaction to start the automation. It will be deployed on the same machine on which users perform the day-to-day tasks.
Suggested: Implementing generative AI with ServiceNow
Implementing RPA with ServiceNow
There are 3 components of RPA:
RPA Hub plugin
- Plugins -> Search for “RPA Hub” -> Install
- Check the “Load Device-data” -> Install
- After installing the RPA Hub, you should be able to see the “Robotic Process Automation”application in the Application Navigator.
- Go to Properties and set the Authentication method to Basic and click Save.

Desktop Design Studio
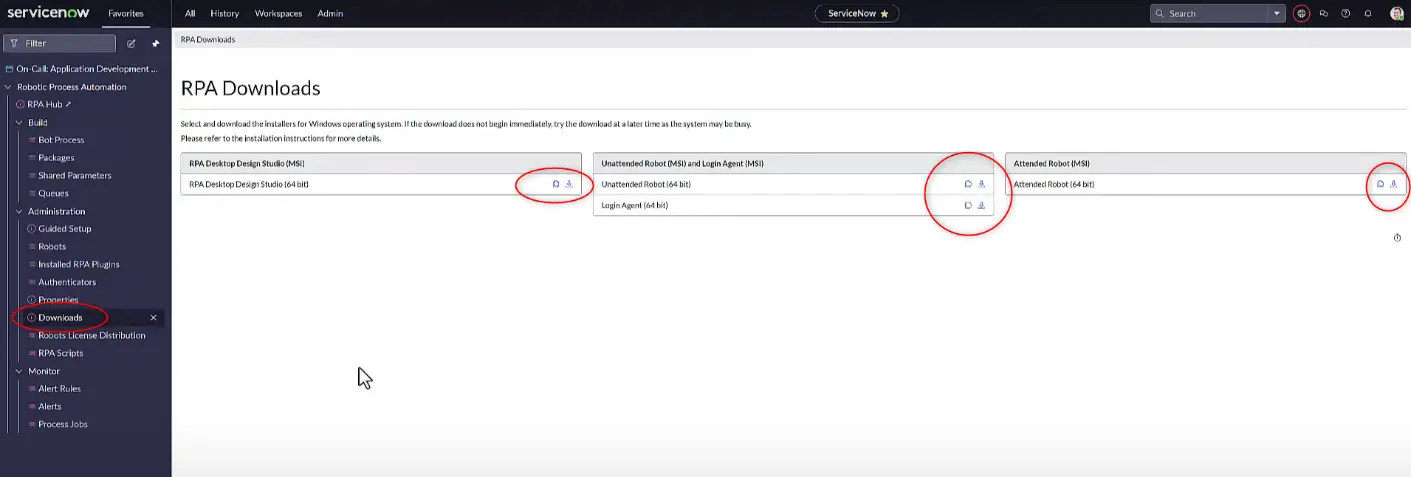
- Go to “Downloads” and download RPA Desktop Design Studio and install.
RPA Bot (Attended and Unattended Robot)
- Go to “Downloads” and download Unattended Robot, Attended Robot,Login Agent and install.
Setup connection: RPA Desktop Design Studio to ServiceNow Instance
1. Open RPA Desktop Design Studio
2. It will ask you to enter the name of your automation and the URL of your ServiceNow Instance.
3. After entering the details, it will fetch related information.
4. Click on Unattended Automation.
5. Please enter name of your automation in “New Unattended Project” dialogbox and click “OK”. This will create project where you can work.

6. Click on “Connect to Instance” button at the top menu.

7. In the RPA Hub – Select your instance and click on “Connect”.

8. Enter your username and password and click “Login”.
9. It may ask you to save your password. Please use your preference.
10. Next it will prompt you to “Allow”, click allow and it will be connected.
Connect Unattended Robot
To connect Unattended Robot, please perform the steps given below:
1. Assign “sn_rpa_fdn.rpa_robot” role to user
Profile – >“Default View” -> Roles -> Edit
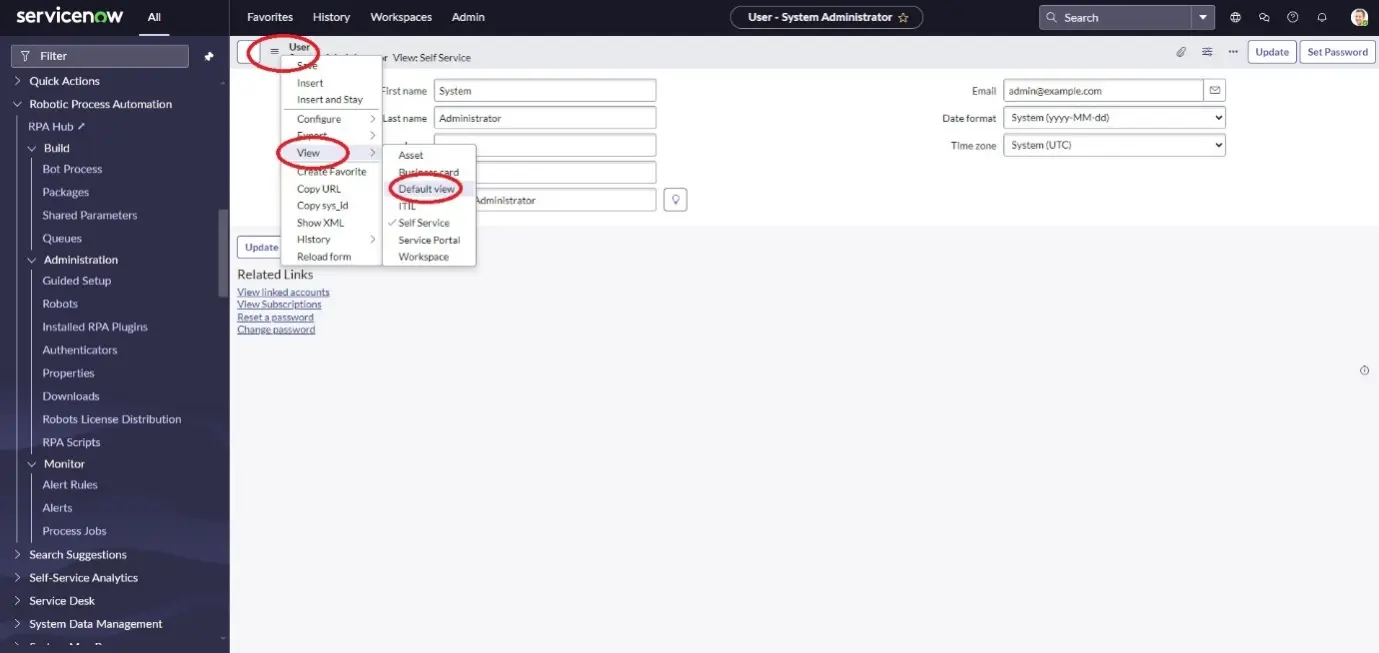
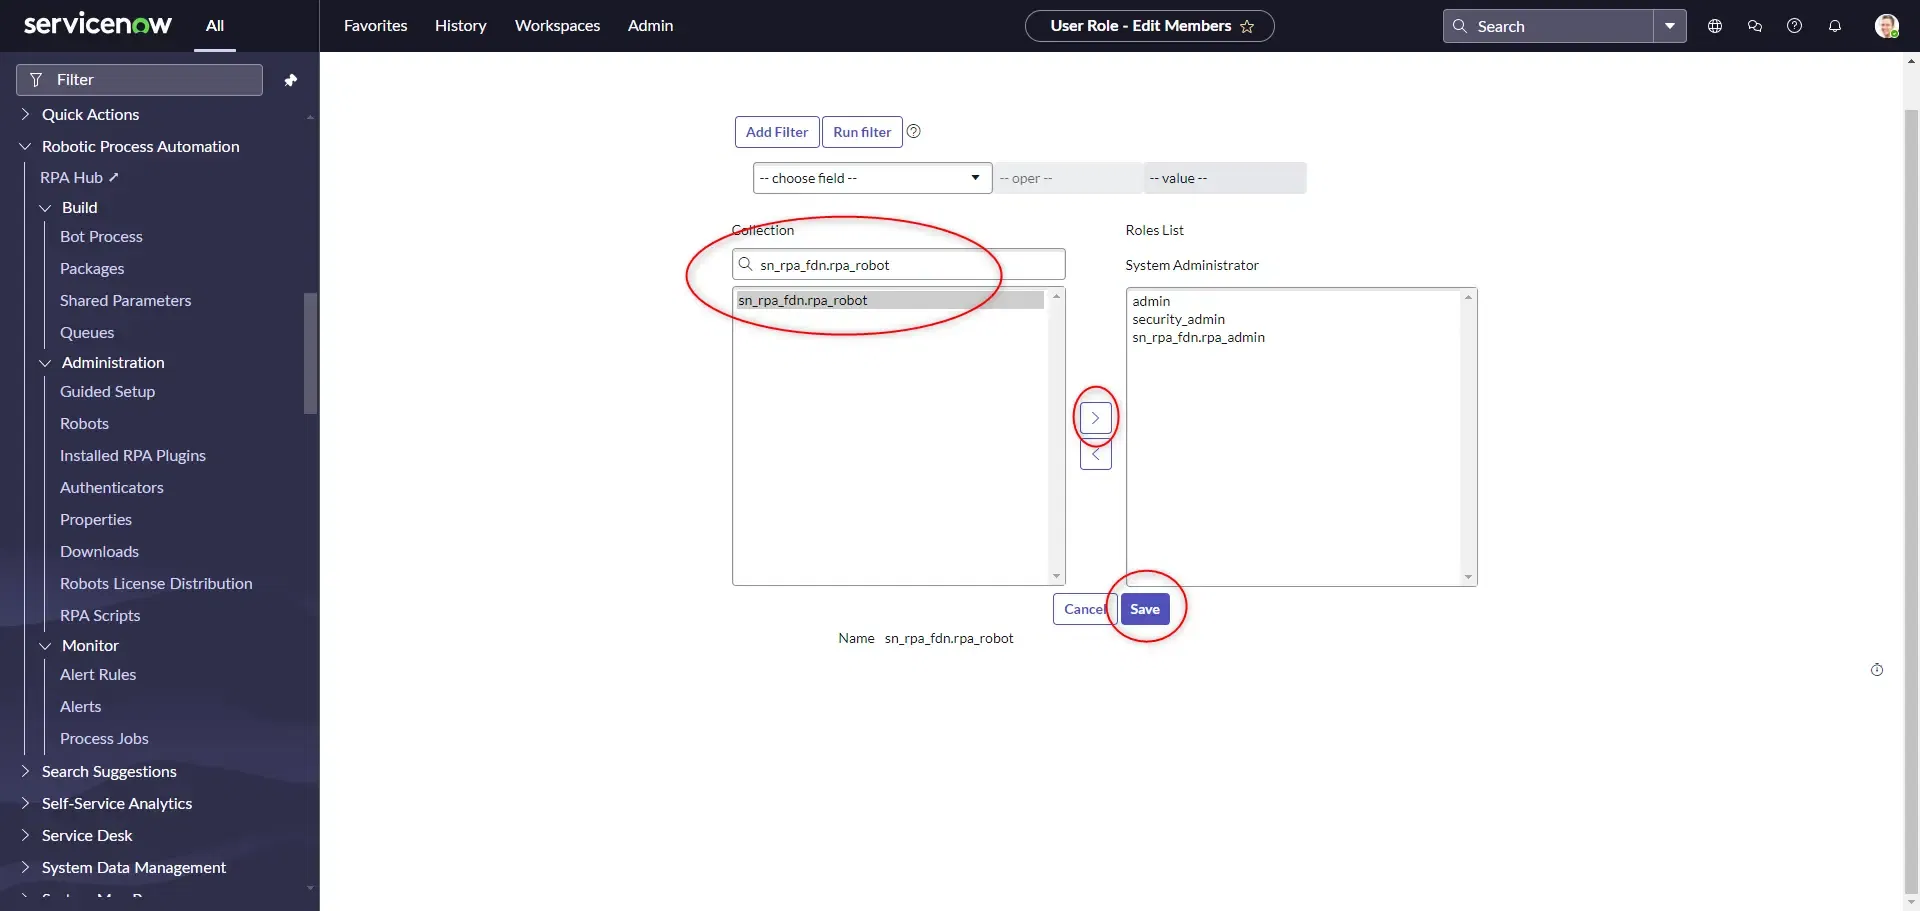
Go to “Roles” and click on Edit.

In the Collection search for “sn_rpa_fdn.rpa_robot” -> Apply ->“Save”
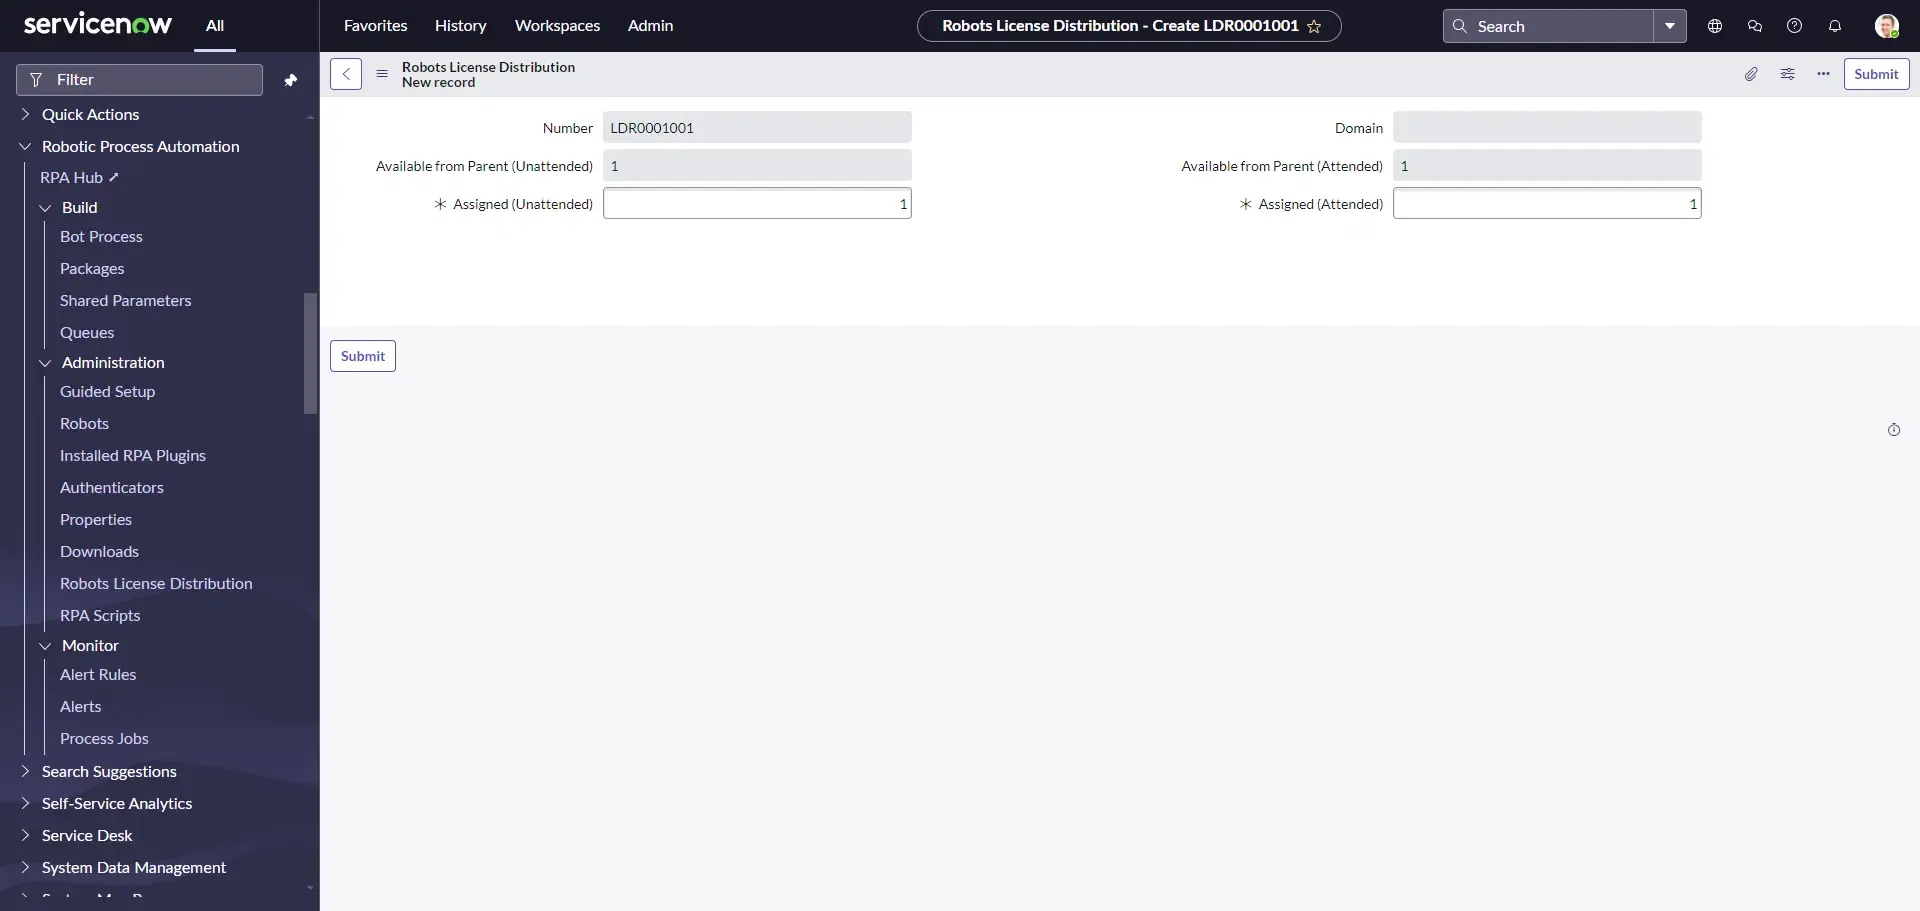
2. Create Robot License Distribution
Robotic Process Automation -> Administration-> Robot License Distribution ->“New”
Fill the details and click “Submit”.
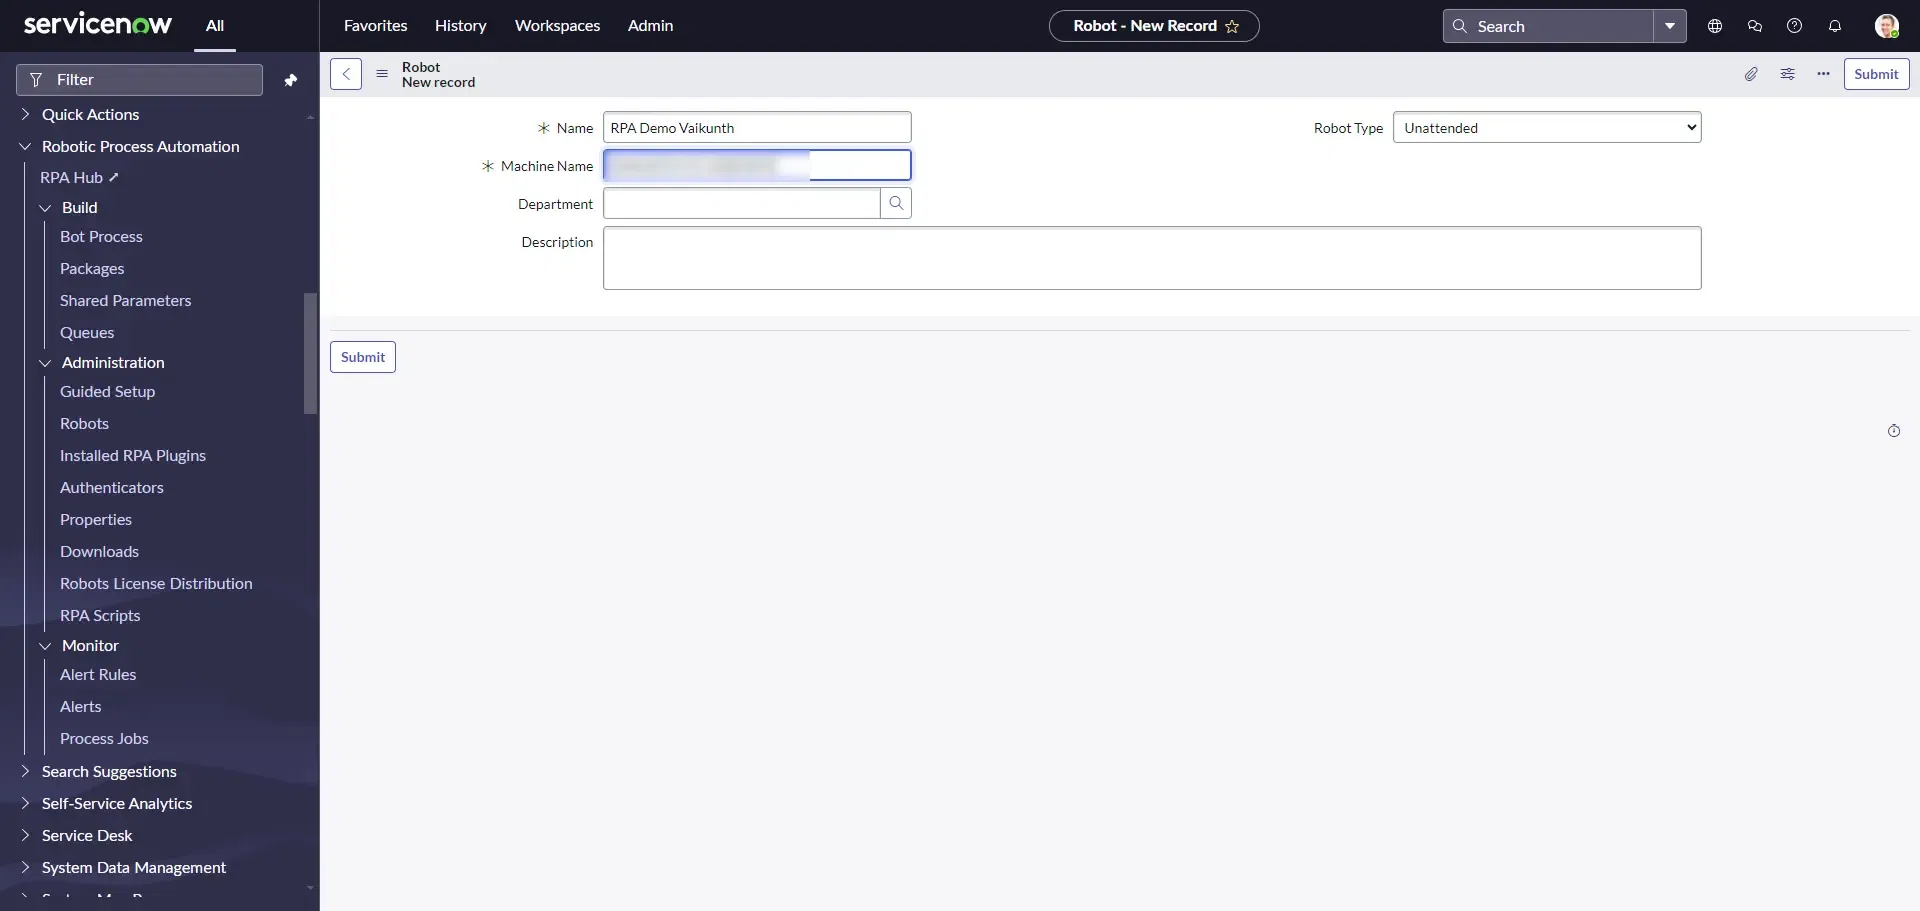
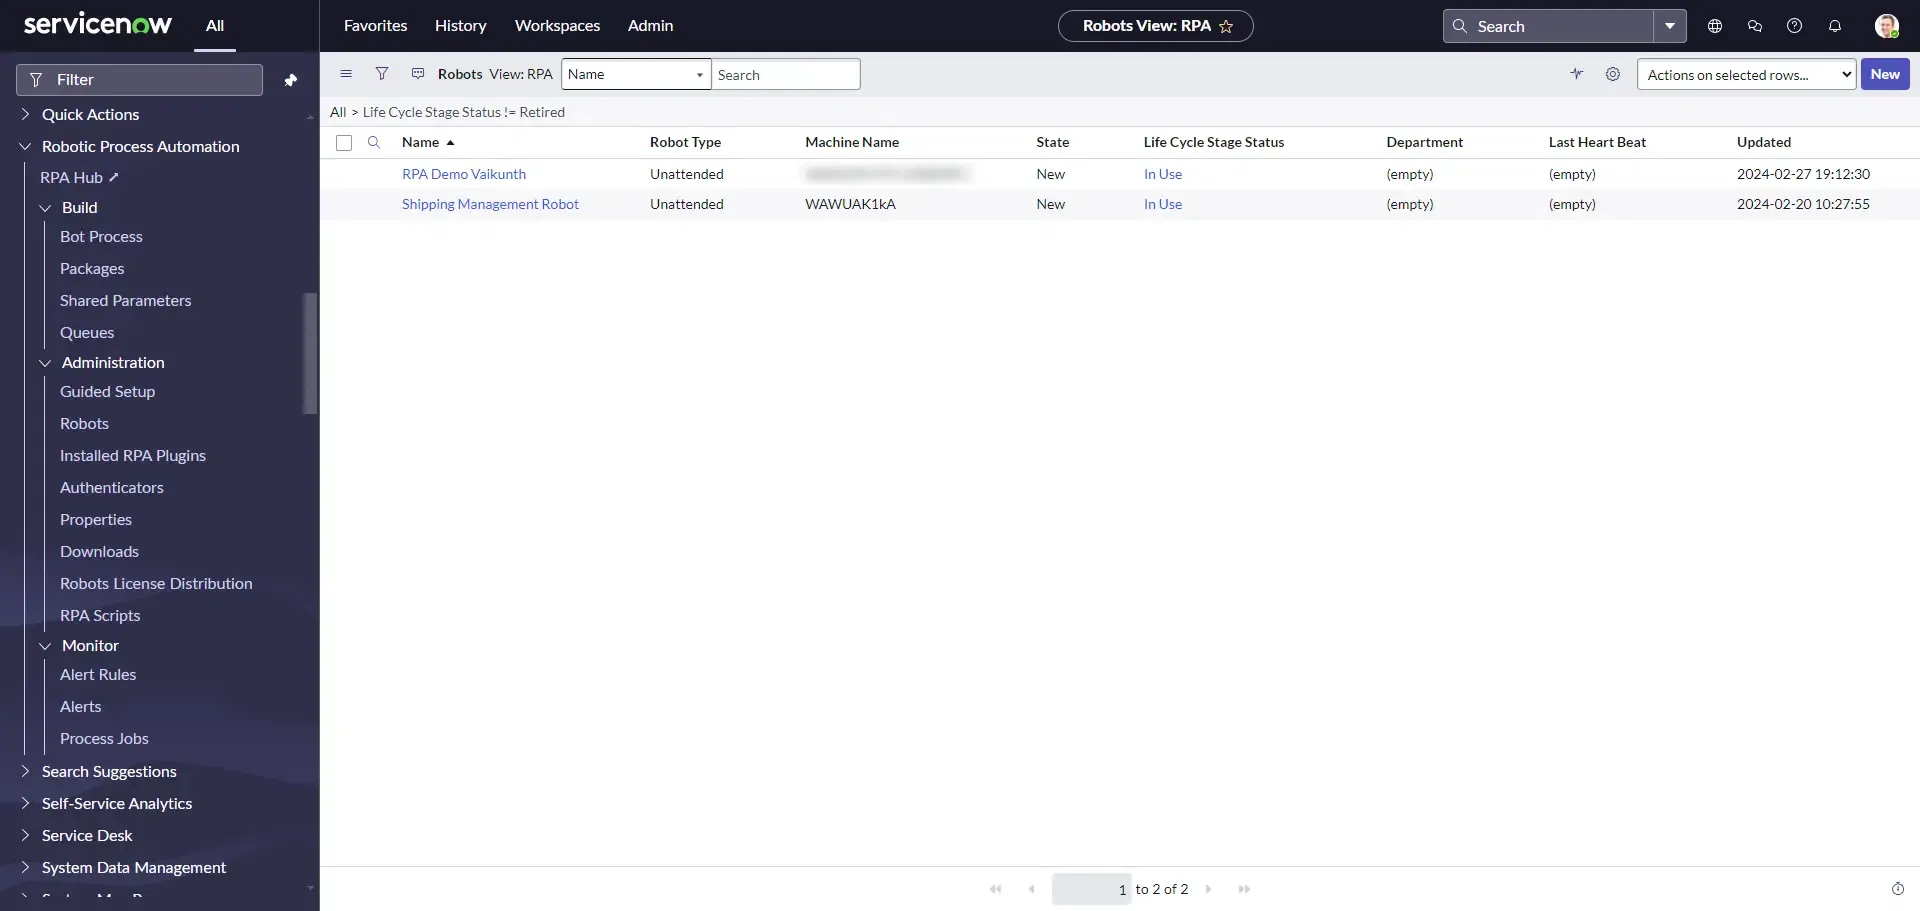
3. Create Robot Record
Go to Command Prompt -> Type hostname and get your hostname.
Robotic Process Automation -> Administration-> Robots-> “New”
Enter your Automation name and Machine Name and Save
Now, let’s connect Robot to Unattended Robot Application
- Open Unattended Robot Application
- Select Basic Authentication
- Enter your Instance URL
- Enter your credentials.

Conclusion
If you follow all the steps mentioned in this guide, the robot will get connected and you will be ready to start with your first robotic flow. We will highlight steps on how to create robotic flow in our upcoming blog. Meanwhile, to have a deeper understanding of the process or RPA use cases, feel free to contact our RPA experts.