Welcome to the future of computing!
Packed with state-of-the-art features and cutting-edge design, the Apple Vision Pro is more than just a pair of smart glasses. It is a portal to a new world of possibilities, where we can seamlessly blend the digital and physical worlds.
From augmented reality (AR) to virtual reality (VR), the Apple Vision Pro opens a whole new range of experiences that were previously unimaginable. With its built-in cameras, sensors and powerful processors, the Apple Vision Pro can track your movements, recognize objects and even translate languages in real time.
In this blog post, we will take a deep dive into the Apple Vision Pro Smart Glass, a groundbreaking new wearable device that is poised to revolutionize the way we interact with digital information.
Introducing Apple Vision Pro
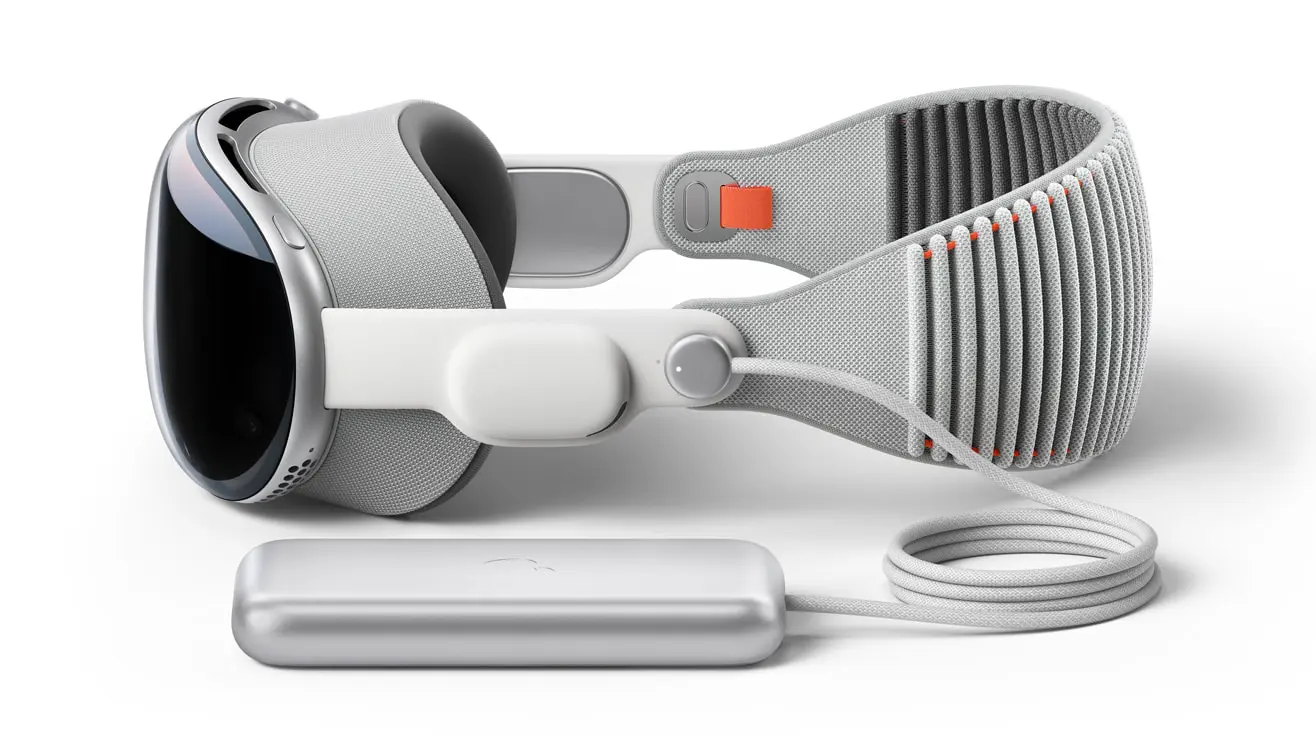
Apple Vision Pro represents the next evolution of wearable technology. It is a lightweight, stylish pair of glasses equipped with an array of cutting-edge features and capabilities.
Display technology and augmented reality (AR) capabilities:
At the heart of the Apple Vision Pro is an extraordinary display technology that sets the stage for captivating, augmented reality experiences. The device employs an ultra-high-resolution micro-OLED display, seamlessly integrated into the lenses. This integration creates a natural and immersive visual environment, enabling users to seamlessly interact with digital content while maintaining a connection with the real world.
The Apple Vision Pro display is powered by a powerful M2 chip with R1 coprocessor, which ensures that even the most demanding AR experiences are rendered smoothly and seamlessly. The display also features a wide color gamut and high dynamic range, which results in stunningly realistic visuals.
Apple Vision Pro also features a suite of advanced sensors, including LiDAR (Light Detection and Ranging). LiDAR allows the device to accurately map the surroundings and provide unparalleled depth perception. This means that digital objects can be placed in the real world with complete accuracy, creating truly immersive augmented reality experiences.
Here are some of the key benefits of the Apple Vision Pro display:
- Ultra-high-resolution: The display has a resolution of 23 million pixels, which is more than four times the resolution of a 4K TV. This results in incredibly sharp and detailed visuals.
- Seamless integration: The display is seamlessly integrated into the lenses, which creates a natural and immersive visual environment.
- Advanced sensors: The device features a suite of advanced sensors, including LiDAR, which allows for accurate depth perception and precise placement of digital objects.
- Immersive experiences: The Apple Vision Pro display is the perfect platform for developers to create new and exciting AR experiences that will change the way we interact with the world around us.

Source: apple
Advanced processing power:
Apple Vision Pro is powered by a custom-designed Apple silicon chip that delivers extraordinary performance for AR and AI-driven tasks.
Here are some of the key benefits of the Apple Vision Pro chip:
- Extraordinary performance for AR and AI-driven tasks
- Smooth and responsive user experiences
- Real-time rendering of intricate 3D graphics
- Complex machine learning algorithms
- Advanced computer vision capabilities
Connectivity, sensors and spatial audio:
Apple Vision Pro is equipped with a suite of connectivity and sensor options. They enable seamless interaction with other devices, precise motion tracking and immersive audio experiences.
Here are some of the key connectivity and sensor features of Apple Vision Pro:
- Connectivity: Wi-Fi, Bluetooth and cellular connectivity enables seamless interaction with other devices, cloud services and remote servers.
- Sensors: An accelerometer, gyroscope and magnetometer enable precise motion tracking and orientation detection.
- Spatial audio: Spatial audio technology immerses users in a three-dimensional audio experience.
- Voice commands: Voice commands and integration with virtual assistants further enhance the hands-free and intuitive control offered by Apple Vision Pro.
Development tools and APIs:
Apple Vision Pro offers a comprehensive suite of development tools and APIs to empower developers to create groundbreaking augmented reality applications.
Here are some of the key development tools and APIs available for Apple Vision Pro:
- ARKit: A powerful framework that provides developers with the tools to create immersive AR experiences.
- Core ML: An on-device machine learning framework that enables intelligent AR interactions.
- VisionOS: The operating system for Apple Vision Pro, which provides developers with access to a wide range of APIs to build AR applications.

Source: apple
Let’s explore a comprehensive guide for developers and the powerful programming tools provided by Vision Pro SDK and guide you through the step-by-step process of setting up the development environment.
Setting up the development environment
Before we start developing with Vision Pro SDK, let’s set up the development environment. Follow these steps:
Step 1: Install Xcode:
Ensure that Xcode, Apple’s integrated development environment, is installed on your machine. Xcode provides essential tools and resources for iOS and macOS app development, including support for augmented reality development with Vision Pro SDK.
Hardware requirements:
1) Vision Pro Device (Currently only simulator available)
2) MACOS device
- Minimum – M1/M2 with 16Gb RAM 512GB SSD
- Recommended – M1/M2 Pro or Max with 16 GB RAM or higher 512GB SSD
Note: Depending on the graphic intensive task, hardware may require higher configuration.
Software Requirements:
Note: The following details are continuously updated as per the enhancement/release in the Beta program.
1) MACOS 14 beta 2
2) XCODE 15 beta 2 or above
3) Reality Composer app
4) AR Quick Look plugin for 3D object file previews
Step 2: Install Vision Pro SDK:
Download and install the Vision Pro SDK package from the official Apple Developer website. The SDK includes libraries, frameworks and documentation necessary for building augmented reality applications.
Step 3: Create a new project:
Open Xcode and create a new project. Select the appropriate template for your desired platform (iOS or macOS) and choose the augmented reality app template. This template provides a basic starting point for developing augmented reality experiences using Vision Pro SDK.
Exploring Vision Pro SDK programming tools:
Vision Pro SDK offers a rich set of programming tools to facilitate augmented reality development. Let’s dive into some of the key tools:
ARKit Framework:
ARKit is Apple’s augmented reality framework, which forms the foundation of Vision Pro SDK. It provides high-level APIs for creating augmented reality experiences, including motion tracking, scene understanding and light estimation. Developers can leverage ARKit to integrate real-world tracking, 3D object placement and realistic rendering into their Vision Pro SDK projects.
Vision Framework:
The vision framework empowers developers with advanced computer vision capabilities. It includes a wide range of algorithms and models for image analysis, object detection, text recognition and barcode scanning. Vision framework seamlessly integrates with ARKit, enabling developers to create immersive and intelligent augmented reality experiences.
Building an AR application:
Now that we have our development environment set up and are familiar with the programming tools, let’s build a simple augmented reality application using Vision Pro SDK. Follow these steps:
Step 1: Set up the AR view:
Create a new Xcode project and select the “augmented reality app” template. This template sets up a basic AR view and provides the necessary configuration.
Step 2: Import vision and ARKit frameworks:
In your project, import the vision and ARKit frameworks to access the Vision Pro SDK and ARKit APIs.
swift
import Vision
import ARKit
Step 3: Configure ARKit session:
In your AR view controller, configure the ARKit session and set it up with appropriate tracking configurations and options.
swift
let configuration = ARWorldTrackingConfiguration()
configuration.planeDetection = [.horizontal, .vertical]
arView.session.run(configuration)
Step 4: Perform object detection with vision Pro SDK:
Utilize the Vision Pro SDK to perform object detection within the AR environment. Implement the performObjectDetection function to handle object recognition using the vision framework.
swift
func performObjectDetection(on image: CVPixelBuffer) {
    let request = VNRecognizeObjectsRequest { request, error in
        guard let results = request.results as? [VNRecognizedObjectObservation] else { return }

        // Process and handle the detected objects
        for result in results {
            let boundingBox = result.boundingBox
            let identifier = result.labels.first?.identifier ?? ""

            // Perform actions based on detected objects
            if identifier == "cup" {
                // Do something for a detected cup object
            } else if identifier == "chair" {
                // Do something for a detected chair object
            }
        }
    }

    let handler = VNImageRequestHandler(cvPixelBuffer: image, orientation: .up)
    try? handler.perform([request])
}
Step 5: Overlay virtual content:
Using ARKit’s capabilities, overlay virtual content onto the real world based on the detected objects. You can create 3D objects, animations, or other virtual content using SceneKit or other ARKit-supported frameworks.
swift
func renderer(_ renderer: SCNSceneRenderer, didUpdate node: SCNNode, for anchor: ARAnchor) {
    guard let objectAnchor = anchor as? ARObjectAnchor else { return }

    let objectNode = SCNNode()
    // Create or load the virtual object and add it to the object node

    node.addChildNode(objectNode)
}
Step 6: Run the application:
Build and run the application on an AR-capable device. Point the device’s camera at real-world objects and the application should detect and overlay virtual content based on the Vision Pro SDK’s object recognition.
These steps provide a basic outline to build an augmented reality application using the Vision Pro SDK. Customize the code snippets as needed and extend the application’s functionalities based on your specific requirements and desired features.
How Vision Pro will change the future of MR?
Apple Vision Pro is a major leap forward in wearable technology, with unrivalled display, AR, processing, networking and audio. The Vision Pro SDK enables developers to create compelling AR experiences.
The introduction of Apple’s MR device brings innovative features, enhanced interactivity and improved graphics. It elevates the overall quality of MR content and applications. Additionally, Apple’s strong focus on privacy and security can address concerns in the MR space.
Apple’s entry into the MR market can drive significant advancements and wider adoption of MR technology, shaping the future of mixed reality experiences.